Savage Automation Delivers 3D Printed Commercial Manufacturing Aids
The company's approach to designing end-of-arm tooling and other devices has evolved over the years to support longevity and repairs.
Before founding Savage Automation LLC (Farmington, Utah) in 2017, Richard Savage had more than 15 years’ injection molding experience. While working for a molding shop, he attended a trade show in Germany in 2016 and saw a 3D printed end-of-arm tool (EOAT), which proved a “lightbulb moment,” as previous experience had demonstrated that the long lead times and design constraints of traditional EOAT was a serious pain point for molders. When he returned to Utah, Savage designed a simple polymer additive gripper to grab four parts from a mold, had it printed by a local service bureau, then used it at his job.
Although it only cost a few hundred dollars to produce, the EOAT ran for 2 months before crashing. However, unlike metallic EOAT, it didn’t damage the mold. Over the next year, Savage designed several more polymer AM EOAT for the company to use. In 2017, he approached management about adding AM capabilities, but leadership wasn’t interested. He used the opportunity to start a side business designing EOAT and fixtures for other molders to be printed locally.
“It was a great situation for a startup, as costs were low since I was designing parts myself in my spare time and using outside vendors to print them,” Savage recalls. “By 2019, things really took off and we were so busy I decided to leave my old company and pursue this full time.”
As the company grew, it brought printing in-house as well as assembly, inspection and packaging. Since then, Savage Automation has specialized in developing and producing robust EOAT and fixtures that solve problems and simplify installation and operations for injection molders — which represent 90% of the company’s current customer base, with 70% of them molding for the medical industry. More recently, Savage has produced fixtures for composite parts used in the aerospace and performance sporting goods segments.
“We produce a lot of one-off products of high complexity and high value with lots of design time involved, so additive is perfect for that kind of low-volume/high-mix work,” Savage continues. “Basically, we consider additive to produce anything that’s high cost or takes a long time to machine in metals, although we ask customers to bring us a problem and then rely on us for the automation solution, as you don’t want to tie your supplier’s hands when they might have a better product or process to use for your particular situation. We’re not a 3D printing company that makes some automation parts; rather, we’re an automation company that happens to use a lot of 3D printing.”
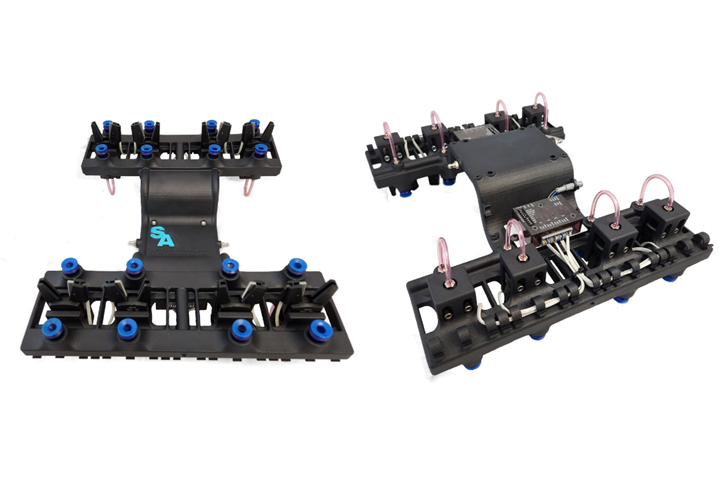
Two views of a largely 3D-printed EOAT showing pneumatic grippers and suction grips on the part-facing side (left) and connections on the robot-facing side (right). Photo Credit: Savage Automation LLC
Molders typically send Savage Automation a mold layout and a part drawing that the team uses to design an end effector, fixture or other manufacturing aid. Next, the team produces prototype aids on its Onyx One FDM/FFF printer from Markforged Inc., which can print in neat or discontinuous carbon fiber-reinforced PA6. The team also prints prototype parts in epoxy on its Form 3 SLA printer from Formlabs, as the latter produces high-quality surfaces and permits the team to accurately match gripper finger designs to a replica of the part surface to ensure EOAT fit and function. When the design is ready, commercial manufacturing aids are printed in PA12 via a powder bed fusion (PBF)-type printer — either MJF from HP Inc. or Fuse 1 SLS from Formlabs — for highly complex components, or on a Markforged if the design involves an inspection fixture for a flat part or where dimensionality is critical. For soft-touch surfaces, the team manually attaches either its own printed gripper pads or purchased ones. Overflow work is sent to outside service bureaus.
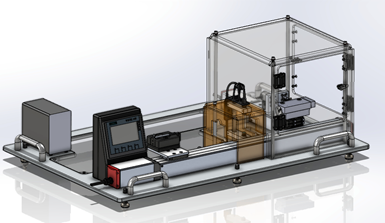
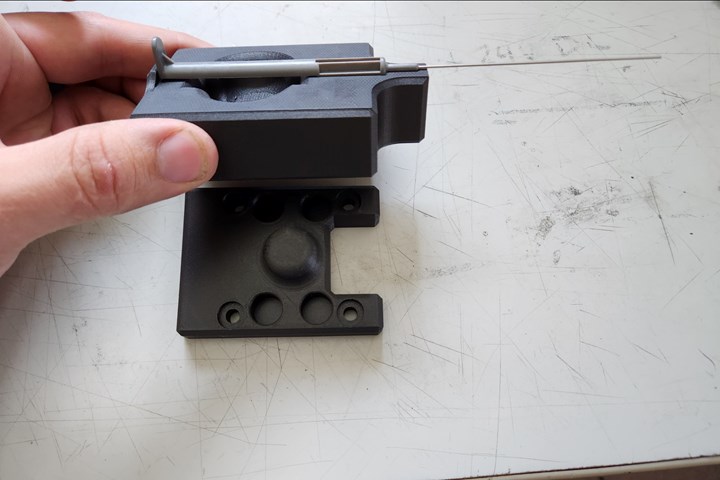
Top image shows a rendering of a complete assembly fixture, with many of its critical parts 3D printed in carbon fiber-reinforced PA on a Markforged printer owing to its ability to produce parts with good dimensional tolerances and flatness. Lower image shows a 3D-printed assembly nest from the larger assembly fixture. The top piece is removable to enable the operator to load parts in the fixture before placing the latter in the machine where parts will be joined via a UV-cure adhesive. A central pin keeps top and bottom parts aligned before assembly. Several additional nests can be preloaded while the current part is being assembled. Photo Credit: Savage Automation LLC
Over time, the team has changed its approach to designing manufacturing aids. “First, we tend to design hybrid systems with an aluminum backbone on which we bolt a printed tool, as print envelopes are still relatively small on most machines and larger polymer AM parts aren’t as strong,” Savage explains. “Second, we switched from single-bodied designs to multi-bodied ones because occasionally a robot will crash and damage an EOAT. If it was produced as a single piece, then most likely the whole unit would need replacing, whereas if the design is modular, then maybe only one or two smaller pieces need to be changed, which is less costly to replace and gets the molder up and running faster.”
He also notes that with conventional EOAT, there’s no easy location to position air/vacuum lines, so tools end up with a nest of lines that are zip-tied together. “With additive, we can just print integral channels so air lines run through the body of the part and there’s only one connection line for each hookup and it’s clearly labeled,” Savage continues. “It’s the same thing with mounting grippers or suction cups. With additive, you can just print them into the body so you don’t have to worry about screws coming loose and pads or gripper fingers falling off. Another way we’ve changed our design approach as we’ve learned more about 3D printing is that we now manipulate the ductility and Shore hardness of a part, not by changing the polymer, but by changing how we print the lattice, our printer orientation and so on. As you modify the lattice and its thickness, you modify the flexibility of the geometry, which is very helpful when you need to control grip forces to handle delicate parts.”
More From This Author
Peggy Malnati is a Detroit-based contributing writer for CompositesWorld magazine, for which she primarily reports on automotive and ground transportation. SUBSCRIBE HERE
Related Content
Video: Reinforcing (and Joining) Parts After 3D Printing
Reinforce 3D has developed a method that can be applied to strengthen 3D printed parts by feeding continuous fiber and resin through them. The technique also enables joining parts of various materials and manufacturing methods.
Read More8 Social Media Posts About Additive Manufacturing: AM Radio #34
Cost savings, modifications, large-format AM and more. In this episode of AM Radio, we discuss what people are saying about additive manufacturing on social media.
Read More3 Unique Elements of LFAM to Consider in Design
While similar to desktop fused filament fabrication (FFF), large format additive manufacturing (LFAM) in polymer composite poses several unique challenges as a result of its scale.
Read MoreAdvancing Additive Manufacturing With a CATCH and Release Approach
Solutions for energy efficiency, sustainability, part repair and more are developing at Siemens’ Charlotte Advanced Technology Collaboration Hub (CATCH) in North Carolina.
Read MoreRead Next
Forerunner 3D Supports Automation with 3D Printed EOAT
The custom 3D printing company uses 3D printing in combination with other technologies to deliver end of arm tooling for part handling.
Read More8 Ways the Plastics Industry Is Using 3D Printing
Plastics processors are finding applications for 3D printing around the plant and across the supply chain. Here are 8 examples.
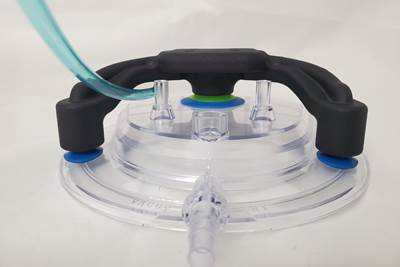
Read More3D Printed Human-Operated End-of-Arm Tooling Promotes Safety and Throughput
Toolmaker and injection molder Zero Tolerance developed a manual tool to enable an operator to quickly place inserts into a mold.
Read More
.jpg;width=70;height=70;mode=crop)

