Zeiss, ORNL Developing X-Ray CT-Based Characterization for AM Parts
The new methodology is designed to rapidly qualify new alloys, powder materials and processes for printed parts and enable rapid certification and qualification of AM components.
Share
Read Next

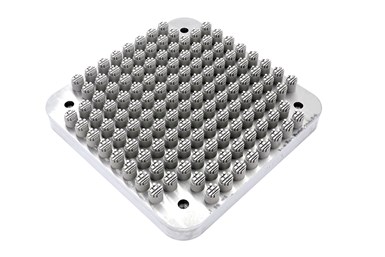
AM samples on build plate
Carl Zeiss Industrial Metrology is collaborating with the Oak Ridge National Laboratory (ORNL) on a project to advance characterization of additively manufactured parts using X-ray computed tomography (CT) and artificial intelligence (AI). The project was chosen to receive funding through the U.S. Department of Energy’s (DOE’s) Technology Commercialization Fund (TFC) project solicitation.
The project is led by Dr. Amir Koushyar Ziabari, an ORNL R&D staff scientist. Zeiss and ORNL have a cooperative research and development agreement (CRADA) to develop and commercialize a comprehensive powder-to-part characterization methodology for additive manufacturing (AM) using the Zeiss 3D ManuFACT Solution — a holistic, integrated inspection workflow. The new methodology is designed to rapidly qualify new alloys, powder materials and processes for printed parts and enable rapid certification and qualification of AM components.
"We want our X-ray CT (XCT) machines to be able to drive AM processes toward printing consistent, predictable and repeatable parts," says Dr. Pradeep Bhattad, business development manager for AM, Zeiss Industrial Quality Solutions. "Due to the complexity of AM parts, X-ray CT is increasingly becoming the preferred technology to qualify the parts. However, AI-based X-ray CT has the potential to revolutionize nondestructive testing (NDT) and metrology beyond just the AM industry."
Dr. Ziabari and his co-investigators developed an algorithm for use with these computational imaging systems. "The AI-based technology enhances XCT capabilities, producing fast and high-quality images with significant improvement in noise and artifact suppression, thus improving accuracy of measurements," explains Dr. Ziabari.
X-ray CT-based characterization provides insights into processing, microstructure, material properties and performance of complex AM parts. ZEISS XCT systems’ nondestructive evaluation (NDE) capabilities are particularly critical for inspecting metal AM parts. "A scanner will acquire a series of projections of a part, such as an airplane engine turbine blade from different angles, and these are then reconstructed into a 3D volume using a mathematical model such as FDK," says Dr. Ziabari. ORNL’s algorithm improves this process by leveraging existing computer-aided design (CAD) models for 3D-printed parts along with the physics-based information to train a deep convolutional neural network that learns to remove the noise and artifact from synthetic XCT data, and then applies the trained network to actual experimental XCT data.
Related Content
-
Q.ANT’s Compact Quantum Sensor Analyzes Particles for Improved Quality Control in Additive Manufacturing
The particle sensor measures the size, speed and trajectory of particles in liquids and gases.
-
Phase3D’s True Layer Thickness Measurement Certifies Uniform Distribution for Every Layer of the Build
The True Layer Thickness tool kit provides objective measurement data to inspect every build in real time.
-
Nikon Acquires Avonix Imaging
Nikon aims to strengthen its X-ray digital inspection solutions by combining its rotating target X-ray sources and proven software with Axonix Imaging’s expertise in the design of configurable systems, controls and product handling.


