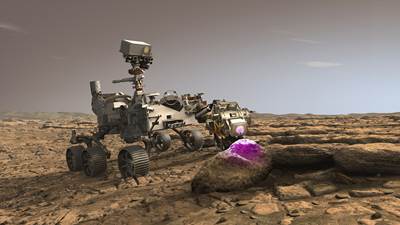
An instrument system that is part of NASA’s Mars Perseverance Rover, scheduled to land on Mars this month, uses components 3D printed through electron beam melting (EBM) by Carpenter Additive. The titanium parts were challenging to produce because of a design relying on internal lattices and other delicate features to achieve high strength despite minimal material use in accordance with a strict mass budget. As this episode of The Cool Parts Show describes, NASA engineers had to design these components without considering how they might be made. The resulting manufacturing process demands not just 3D printing, but also a sequence of postprocessing steps including chemical milling.
See replicas of the Perseverance additive manufactured parts in this episode, which we filmed while Perseverance itself was in the final days of its approach to Mars.
The Cool Parts Show is a video series from Additive Manufacturing Media that explores the what, how and why of unusual 3D printed parts. Watch more here.
Have a cool part to share? Email us.
Related resources:
- Article: Mars Rover Instrument Is Manufacturing Challenge, 3D Printing Victory
- About NASA’s Perseverance mission
- Carpenter Additive
- Electron beam melting (GE Additive)
- More on additive manufacturing for lightweighting
Transcript
Pete Zelinski
These parts are headed to Mars.
Stephanie Hendrixson
In this episode of The Cool Parts Show, we'll talk about additive manufacturing's role in the Perseverance rover.
Pete Zelinski
I'm Pete.
Stephanie Hendrixson
I'm Stephanie.
Pete Zelinski
Welcome to The Cool Parts Show.
Stephanie Hendrixson
This is our show all about cool, interesting, unusual, unique, 3D-printed parts. It's our first episode of 2021.
Pete Zelinski
That's right, and we have parts that are on their way to Mars. We have replicas of parts headed to Mars. These are components of NASA's Perseverance rover, scheduled to land on the surface of Mars, February 18th.
Stephanie Hendrixson
That's right, these parts are cool, because they are on their way to another planet. But they were also very difficult to manufacture. 3D printing played a big part, but it doesn't tell the whole story, and we're going to take you through that process today.
Pete Zelinski
Yeah, among other things, these parts are examples of extreme lightweighting. They had to fulfill their function within a very strict budget of the amount of mass they're allowed to have. That ultimately shaped a lot of the manufacturing considerations and the number of steps that were involved. These replica parts haven't undergone all of those steps, so these are unfinished compared to what's on their way to Mars, they don't look exactly like them. But they're plenty to let us talk about all the challenges that went into making these special parts. There are four components here — they all go together. Stephanie, could you describe the system that these components are a part of?
Stephanie Hendrixson
Yeah, so these are all part of the PIXL. It's the Planetary Instrument for X-ray Lithochemistry. So part of the Perseverance Rover's mission is to assess the potential for life on Mars and this instrument is going to be part of that mission. So the PIXL is going to be used to look at rock and soil samples on the planet's surface, look for those signs of life. And the other interesting thing to note about it is that it's going to be on the end of this cantilever arm, basically on top of a hammer drill. So not only do these components, this instrument, have to survive the launch, the spaceflight, the crash landing on Mars — they're also going to be in a really challenging location on the rover when it's actually in use.
Pete Zelinski
The parts are titanium, Ti64, they are made through electron beam melting. These components were designed by NASA engineers and produced through additive manufacturing by Carpenter Additive.
Stephanie Hendrixson
And we should say you may have seen Carpenter Additive as a sponsor on other episodes of The Cool Parts Show. This is not sponsored content, we just really think these parts are cool.
Pete Zelinski
Right, and we think you'll agree. So, Stephanie, you mentioned how 3D printing is not the whole story here. That's pretty crucial, and we're going to draw that out. 3D printing was essential for producing these complex parts — more complex than they seem to be, we'll get to that — but 3D printing was not sufficient for producing them. There were a variety of postprocessing operations necessary to complete these parts to the design requirements that NASA had. Carpenter oversaw that, they put together that sequence of steps and delivered that process, 3D printing through post processing. If you think about it, what the NASA engineers were tasked with — so yeah, that PIXL device, it has to perform its duty at the end of that drill. And let's not minimize: it's got to survive a trip through space, it's got to survive landing on the surface of Mars, it's got to do everything it needs to do within very constrained limitations of how heavy it can be. In the end, the designers didn't have bandwidth to think about, “Could these parts even be made?” And it turns out, they're pretty difficult to produce.
Stephanie Hendrixson
Yeah. So earlier, you called this a case of extreme lightweighting. And, you know, that's something I think we've come to associate with additive manufacturing, but in this case that's not even where NASA's mind was. So let's talk about that a little bit, just like what were they thinking? What were their concerns as they were putting this design together?
Pete Zelinski
Right, so if you step back and you look at these components, it's like, they're simple parts or simple in what they do. These are brackets, this is a housing component, right? Seemingly, these are the mundane parts of the instrument. But if you're not careful, these components could eat up all of your mass budget and you need that mass, you need it for the sensors and the electronics that let this instrument do the work it needs to do. So how do you get weight out of parts like these? It comes down to design consideration, it comes down to aspects of the design you wouldn't even have to worry about if this was being used on Earth. For example, in places and angles where two surfaces come together, not allowing the fillet there, or the web of material to be as large in diameter as you might otherwise allow it to be, because that's just a little bit too much metal in there and it eats up mass unnecessarily. Or components like these, which look like they could have been made out of, say, bent sheet metal. What parts like these actually are, are very, very thin wall structures that are hollow inside and have delicate lattices that provide the strength at minimal weight. I think this is a good moment to hear from Carpenter Additive, let's bring in Ken Davis, who is director of Additive Technology.
Ken Davis, Carpenter Additive
Yeah, I never heard the term mass budget more in my life than on this project. The total instrument package — two components, one out on the arm, and one on the rover body — total about 16 pounds for the entire experiment. And we were originally told we couldn't add a single gram. There are 28 grams to an ounce. Over an 18-month period of performance, as we kept asking for concessions for manufacturability, we did ultimately add about 22 grams, or about three-quarters of an ounce. So we went back to the designers and we asked for concessions for allowing us a little bit more wall thickness for increasing a certain feature size, decreasing another feature size, concessions that would typically be awarded on a terrestrial-based component where a little bit of mass doesn't matter. But these mass budgets are critical. The designers came back and said, "Hey, we understand what you're asking for. We totally do and we want to help you, but we need you to hold this mass."
Stephanie Hendrixson
Well, so listening to Ken talk, you really get a sense of the position Carpenter was in. Like they have this really strict mass budget to work within, but at the same time, they can't just make any design changes that they want to. They have to really adhere to the original design from NASA, and they still pulled it off. Let's talk about that. What was the 3D printing process used?
Pete Zelinski
There were basically two choices, two ways to get fine, detailed components like these in metal 3D printing: laser powder bed fusion, or electron beam melting. Of those two, the laser option is the finer detail choice, but it's not the choice that Carpenter made. They went with electron beam melting instead.
Stephanie Hendrixson
Yeah, and that's an important distinction. Like these are sort of similar processes, they're both powder bed fusion — you have your bed of powder, you have a recoater, and then you have an energy source, either that laser or the electron beam that's melting the powder together to form your parts. But with laser sintering, the unused powder kind of stays loose in the bed. And with electron beam melting, you're printing at a really high temperature, the whole machine is at a really high temperature. So you're basically heat treating at the same time you're printing. You don't end up with solid parts in loose powder, you end up with solid parts in this kind of like semi-sintered cake of powder. Like you're saying, you get some trade-offs with that. You may lose some of the detail and resolution that you could get out of a laser process, but you're also able to avoid some of the challenges with support structures and the thermal stresses that you might get from that other process.
Pete Zelinski
Thermal stresses are what was really key in what drove the choice in this case. Electron beam melting uses a coarser powder, so even though it is a fine-detail process, at its finest it still produces thicker, heavier forms and features than a laser-based process does. But electron beam melting offers that opportunity to reduce and control thermal stresses, and that was really critical here because the Carpenter engineers just didn't have the opportunity to add extra material here and there to provide a little bit of bolstering and support against the warping that might happen due to thermal stresses as the parts were being built. That lower thermal stress environment was what was essential for producing these really fine-detail forms for maintaining the geometric fidelity of these fine-detail parts and features.
Stephanie Hendrixson
Okay, so electron beam melting becomes the manufacturing solution here. But there's still trade-offs, like this introduces some really interesting postprocessing challenges, because a lot of these pieces are hollow. If you're 3D printing with electron beam melting, and you end up with this like semi-sintered cake of powder inside your parts, you can't just pour it out. So, let's talk postprocessing. How did they get that powder out?
Ken Davis
Normally, we use manual tools and agitation to clear this powder and break it apart. But we couldn't get into these small box beams through small access holes that are only about five millimeters in diameter. So we use a technique called ultrasonic powder removal where a transducer is attached to the part, you manually tune the transducer to a frequency that meets the natural frequency of that powder inside and causes it to break apart. But then as it breaks apart, that structure changes its natural frequency, so you have to keep manually retuning. A very small part that would fit in the palm of my hand was so complex, that it took, in some cases, two days of labor to manually adjust this tuning process to get all that powder extracted. But without the ultrasonic powder extraction, we would have never gotten all that powder out of the parts.
Pete Zelinski
So, that's how they got the powder out. But after that, these components are still too big. They're the right shape, they're accurately the right shape, but the features of these components still have too much material, too much mass. Electron beam melting, for all its precision, is still too coarse for some of the delicacy that these features required. For metal 3D-printed parts, machining is pretty typical as an operation after the 3D printing. But machining as we usually think of it — a tool cutting metal — wasn't sufficient for the needs of parts like these.
Ken Davis
As we always say, it's never just additive manufacturing, there's subtractive and other processes that are involved. Additive is just one of the tools you bring to bear on this project, or on any project. And never does a project demonstrate that more than this one. So we couldn't print these thin walls, some were down as thin as 15 thousandths of an inch with a ±one-thousandths tolerance, and then in that same component, it would thicken up to 45 or 60 thousandths in other areas, and then there would be some very heavy features where a bolt was added to the part. What we ended up doing was printing the parts much thicker in general, to a wall thickness that we could guarantee that we could maintain and reproduce print over print with a very narrow tolerance. Then we used chemical milling selectively around the part to bring various wall thicknesses not just into size, but also to achieve the surface finish we desired.
Pete Zelinski
Okay, so we've heard electron beam melting, we've heard ultrasonic vibration for powder removal, we've heard chemical milling, there's a longer list of operations than that. Can you give us a more thorough sequence of the operations that went into making these parts?
Stephanie Hendrixson
So, there's a lot. I have a cheat sheet here because I don't want to forget anything. Taking us all the way back to the printing process, electron beam melting to make the parts; everything went through HIPing, hot isostatic pressing, to eliminate any kind of porosity; then there was breakout, so pulling the parts out of that cake of powder; support removal, some of these parts had sacrificial supports that were attached that had to be removed; ultrasonic powder removal, like we've talked about; deburring and grit blasting; chemical milling also, which we just talked about; they used microtek finishing, which is sort of like a polishing process with an abrasive slurry; and then there was some conventional final machining on these parts as well. But one more thing, in between every single one of those steps I just mentioned, there was also inspection. So they used laser scanning, they used X-ray inspection, they weighed the parts in different stages. These are really complicated components and Carpenter wanted to be sure that if anything was going awry, they could catch it really quickly and start over. They didn't want to put a bad part through all of these different processes. And then at the very end, everything went through CMM inspection before it got shipped off to NASA.
Pete Zelinski
It's worth saying, additive manufacturing usually is not this difficult. These were distinctive parts, special demands called for special processing considerations.
Stephanie Hendrixson
So we've talked on other episodes of the show about DFAM, design for additive manufacturing — this idea that if you're going to 3D print something, you need to be thinking about that 3D printing process from the very beginning of the design stage. That's not really what happened here, NASA was just trying to think of something that would work, that would be functional, without really thinking about how it would be made. But additive manufacturing was able to pull it off with the help of all those other process steps that we talked about. I think these components came in at just a little bit above the mass budget, but it was still within the allowable limits that NASA had.
Pete Zelinski
So we hope for and anticipate a successful landing of NASA's Perseverance rover on Mars on February 18. When that happens, when it's in the news, look for the PIXL device on the rover. Look for these components made through additive manufacturing, look for these cool parts on the surface of Mars.
Stephanie Hendrixson
All right, I think we got this. I'll start. So these are components of the PIXL instrument for the Perseverance rover currently on its way to Mars. They were 3D printed with electron beam melting out of titanium by Carpenter Additive, who was very limited in the kinds of design changes that it could make. It had to really adhere to NASA's mass budget and stick to the original design.
Pete Zelinski
Electron beam melting was just the beginning, it accurately produced parts to the right form, but the parts were far from complete at that stage. Getting the powder out was a postprocessing step that came next. A special ultrasonic vibration process was necessary to accomplish that, get the unfused powder out of the parts. Next came a sequence of postprocessing steps necessary to complete these components, one of which was chemical milling for removing unneeded material, getting a little bit more mass out to get it to that mass budget. NASA engineers did not design these components, thinking about how they would be made — there was too many other things to think about. Ultimately, Carpenter Additive took on the challenge of manufacturing these parts and saw them through to an additive manufacturing process complete with postprocessing that was able to deliver these parts effectively.
Stephanie Hendrixson
Yeah, so this maybe wasn't the ideal workflow for additive manufacturing, but I think that makes it even more impressive. It shows what 3D printing was able to do even working within these really tight requirements. I'd still count it as an additive manufacturing win.
Pete Zelinski
Speaking of additive manufacturing wins, if you are interested in seeing the kinds of things that additive manufacturing is accomplishing on Earth check out our previous episodes. We have done more than 20 episodes now of The Cool Parts Show. Each one focused on a transformative 3D-printed part, all kinds of applications, many different products and industries. Go to TheCoolPartsShow.com.
Stephanie Hendrixson
If you like the show, we hope you'll subscribe. If you're on YouTube, go ahead and click the bell icon to get notified about any new episodes coming out. And if you have a cool part you'd like to tell us about, you can email us at cool parts at AdditiveManufacturing.media.
Pete Zelinski
Thanks for watching. Good luck NASA and Perseverance.
Related Content
8 Cool Parts From Formnext 2024: The Cool Parts Show #78
End-use parts found at Formnext this year address various aspects of additive's advance, notably AM winning on cost against established processes.
Read MoreAirless Basketball Shows Promise of 3D Printed Lattices: The Cool Parts Show Bonus
Successfully matching the performance of a standard basketball demonstrates the control possible over the mechanical properties of digital materials.
Read MoreThis Drone Bird with 3D Printed Parts Mimics a Peregrine Falcon: The Cool Parts Show #66
The Drone Bird Company has developed aircraft that mimic birds of prey to scare off problem birds. The drones feature 3D printed fuselages made by Parts on Demand from ALM materials.
Read More3D Printed Cutting Tool for Large Transmission Part: The Cool Parts Show Bonus
A boring tool that was once 30 kg challenged the performance of the machining center using it. The replacement tool is 11.5 kg, and more efficient as well, thanks to generative design.
Read MoreRead Next
Mars Rover Instrument Is Manufacturing Challenge, 3D Printing Victory
A critical instrument on the Perseverance rover requires five components that could only be made via additive manufacturing. Carpenter Additive overcame obstacles to produce them.
Read MoreHow 3D Printing Enables More Sustainable Designs (Video #2)
The circular economy needs the lightweight, optimized and efficient designs that only 3D printing can provide. More in this video, part of our series on 3D Printing and the Circular Economy.
Read MoreAdditive Manufactured Components Reach Jupiter
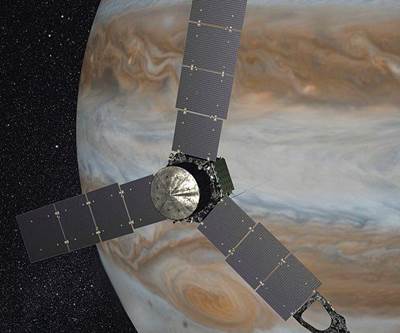
The Juno spacecraft includes titanium waveguide brackets made through AM.
Read More


