Installing a Metal 3D Printer, Part 1: Equipment
When PADT installed a Concept Laser Mlab Cusing R metal 3D printer, the company documented the process from beginning to end. The first in a five-part series.
What Equipment is Needed for Metal 3D Printing?
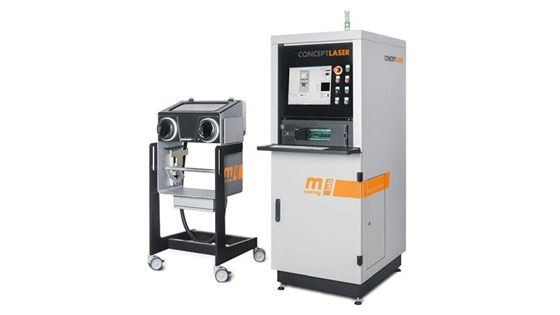
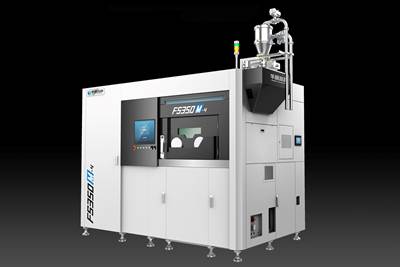
This is the first in a five-part series that brings together the different lessons we learned installing our first metal printer, a Concept Laser MLab Cusing R at PADT (see Figure 1, above). In this post, I list the different equipment needed to enable metal 3D printing end-to-end, along with a brief explanation of its purpose. In subsequent posts, I deal with facilities, safety, environmental and housekeeping aspects of the technology. I hope this information adds to the conversation in a meaningful way and helps those who are thinking about, or in the process of installing, a metal 3D printer.
The specifics of some of this information will vary depending on the equipment and materials you handle, but my hope is the themes covered here give you a sense of what is involved in installing a metal 3D printer to aid in your preparation for doing the same, and for having good discussions with your equipment supplier to ensure these are addressed at a minimum.
One way to look at classifying the equipment needed—beyond the obvious metal 3D printer!—is by its purpose, and I do so here by dividing it into two broad categories: Ancillary Equipment (necessary to the printing itself) and Postprocessing Equipment (focused on the part).
Ancillary Equipment
1. Wet Separator
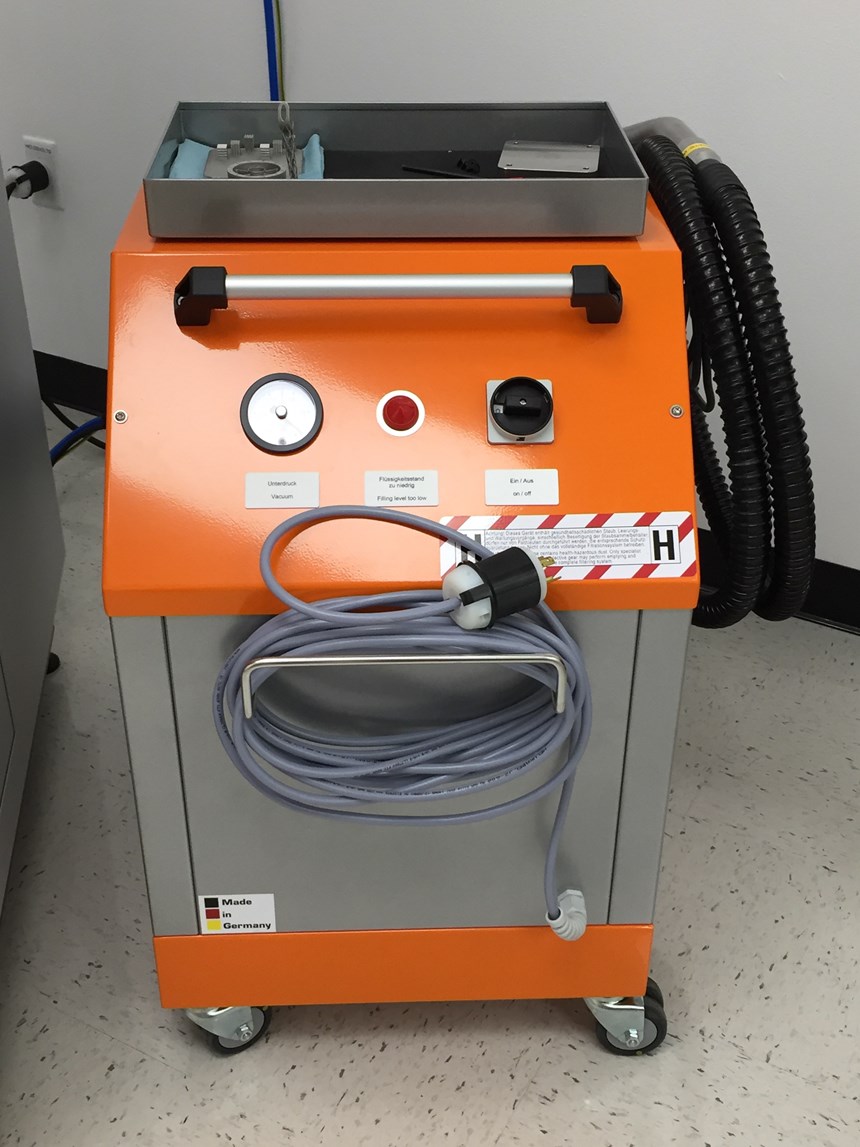
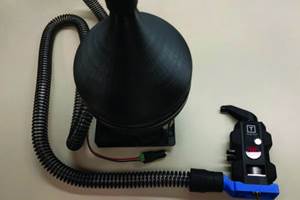
The wet separator (see Figure 2, above) is essentially a vacuum cleaner that is designed to safely vacuum stray (“fugitive”) metal powders that cannot be cleaned up any other way. When dealing with powders, the typical recommendation is to first brush whatever you can into the overflow bin so you can reuse it. The next step is to try and wipe up powder with a moist lint-free cloth (to be covered in the housekeeping post). The wet separator has a water column that passivates the metal powder and renders it non-reactive to allow for easier disposal (to be covered in the environmental post). Wet separators require a significant amount of maintenance, particularly when dealing with reactive metals like titanium and aluminum alloys, where the supplier recommends the wet separator be cleaned out daily. At least one company has developed a kit to help with wet separator cleaning, which gives you an indication of how significant an issue this is. Most suppliers provide a wet separator along with their equipment.
2. Glove Box
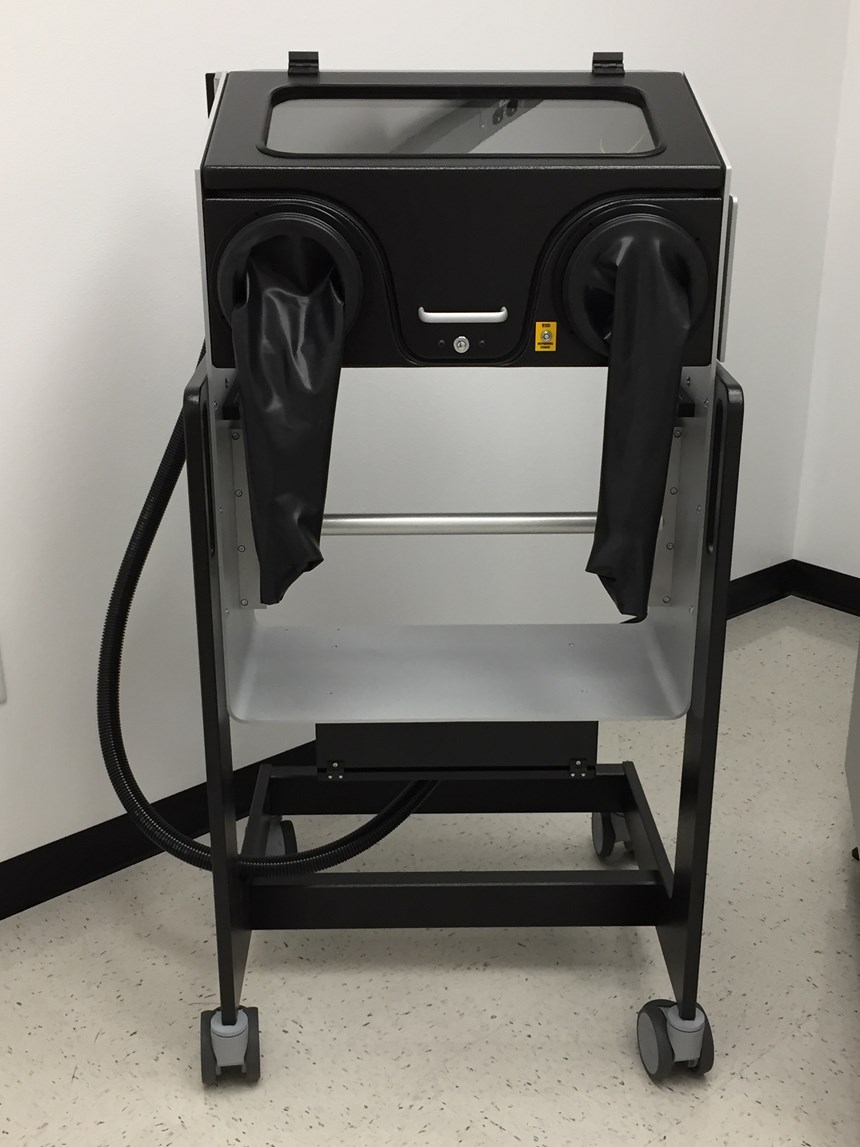
A glove box (see Figure 3, above) is a useful piece of equipment for dealing with reactive metals in particular. The glove box allows an operator to manage all the powder handling in the build chamber to be done in a closed environment. For non-reactive metals, this is not a necessary piece of equipment but it is highly recommended for reactive metals. The glove box when used in concert with reactive metals will allow for inert gas flushing out of oxygen to low PPM levels prior to operator intervention, and also includes grounding connections for the box to the machine. The nice thing about having a glove box is it reduces the amount of time you need to have a respirator on by allowing you to add powder and unpack builds in a closed environment. The glove box may also be integrated into the machine itself—ours is a stand-alone device on wheels that we roll over to the machine when we need it.
3. Powder Sieve
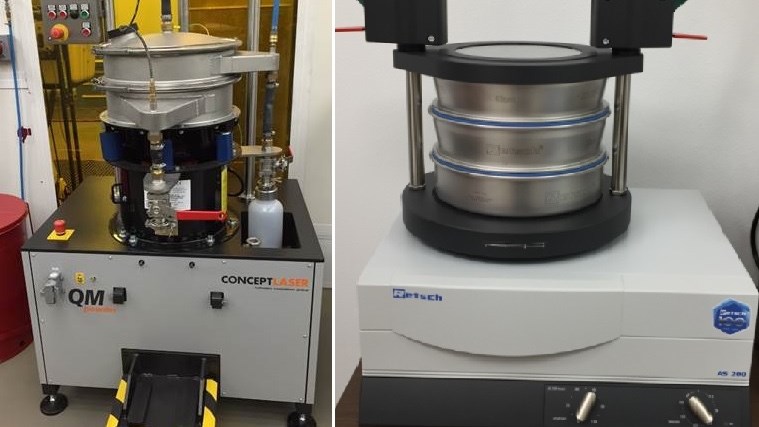
Unless you plan on disposing of all the powder in each build after it is completed, you need a sieve to separate out the larger particles and contaminants from the powder you wish to reuse in subsequent builds. The sieves are also typically provided with the machine and can be enabled with inerting capability (as shown above in Figure 4, left), or come as a small desktop unit (as shown above in Figure 4, right) that can sieve about 3 to 5 pounds of powder at a time. While the sieve on the left may be used for reactive metal sieving, it is uncertain if one can safely use the desktop sieve for the same, even with grounding the table it sits on and the operator. This is a gray area and I am keen to hear thoughts on this from those that have the expertise or experience in this space.
4. Ultrasonic Cleaner
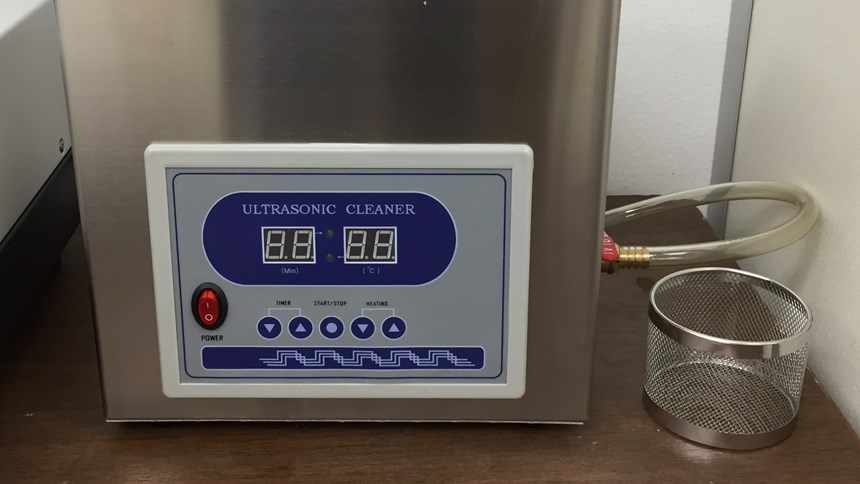
The purpose of the ultrasonic cleaner (see Figure 5, above) is to remove as much trapped powder as possible before the part and the build plate are subjected to any postprocessing. This is to minimize the risk of trapped powder getting airborne during downstream processes—which cannot be completely eliminated (which is why postprocessing equipment should be used all the way through until the final part is in-hand after cleaning).
The ultrasonic cleaner is used twice: first before the parts are removed from the build plate, and again after they are removed. Sometimes I will even use it a third time after all supports have been removed if the part has internal p. I typically use the 40 kHz and 60ºC temperature setting but have not sought to further optimize the parameters at this time.
Postprocessing Equipment (PPE)
1. Furnace
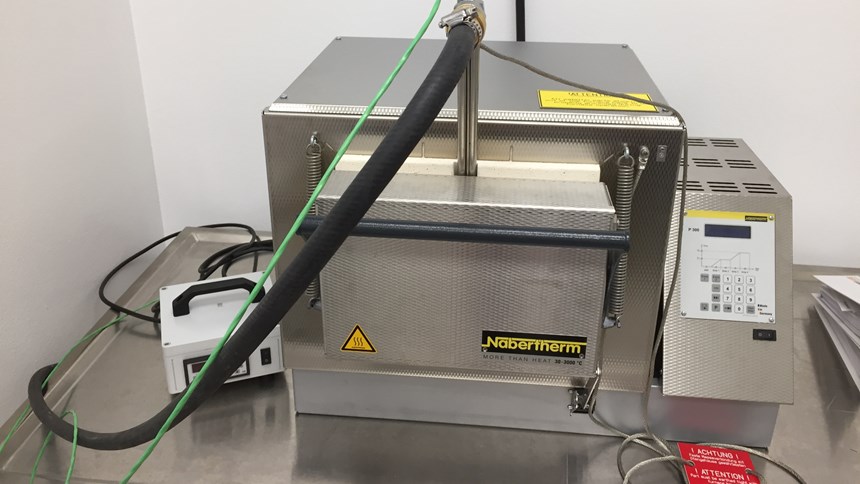
The purpose of the furnace (see Figure 6 above) is to relieve residual stresses built in the parts prior to removing them from the build plate. So, this is the first step after the parts and the plate come out of the ultrasonic cleaner. We use a furnace that allows for nitrogen or argon flushing, and we place our parts wrapped in stainless steel foil in a gas box. Instructions for heat treatment (time and temperature profile) are typically provided on the technical specifications that come with the material. Metals like stainless steel can be stress relieved in a nitrogen atmosphere, but Inconel alloys and Ti6Al4V, for example, require higher temperatures of between 800 and 1,000ºC and argon atmospheres. So, you need to be setup for both gases if you are considering running more than one metal in your operation.
2. Support Removal
All parts are connected to the build plate by between 3 to 5 mm of supports that need to be removed. This is a two-step process: the first step involves removing the parts with supports off the build plate, and this is most commonly done with a table saw or a wire EDM. At PADT, we stumbled upon a third way to do this, using an oscillating hand tool and a carbide blade— which works well for small parts (less than 3 inches in X-Y space). It is important to always wear gloves and a supplier recommended (N95 or higher) respirator while removing supports since there could be trapped powder in the supports that were not removed with the ultrasonic cleaner. The second step is to use hand tools to pry out the supports from the part, which is why it is important to design supports that have weak mechanical connections to the part itself. Ideally, you can tear them off with hand tools like a perforated sheet of paper.
3. Die Grinder
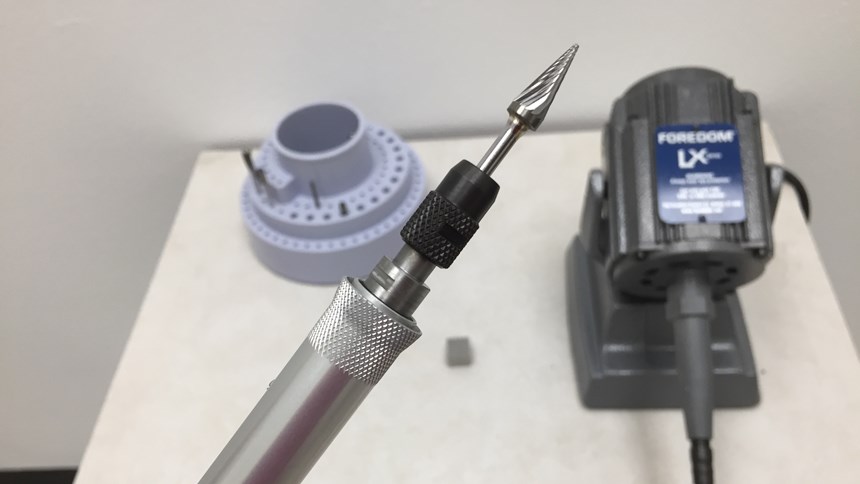
A carbide die grinder (see Figure 7, above) is then used to grind away the support-model interface. For some parts—especially tiny parts—this can be achieved with a hand file, but it is easier to do with a die grinder. For large parts, this need can be eliminated by designing in regions that are to be machined later and aligning these regions with supported regions to reduce the need for finishing on these surfaces.
4. Face Milling
This may come as a bit of a surprise, but you also need some way of replenishing the build plates after use so you can reuse the plates. This involves using a face milling technique to remove all the remnant supports on the build plate and take off a thin slice at the top of the build plate while retaining flatness to within 100 microns (0.004"). Having this capability in-house will greatly speed up your ability to start successive prints and reduce the need to keep large inventories of build plates.
5. Surface Finishing
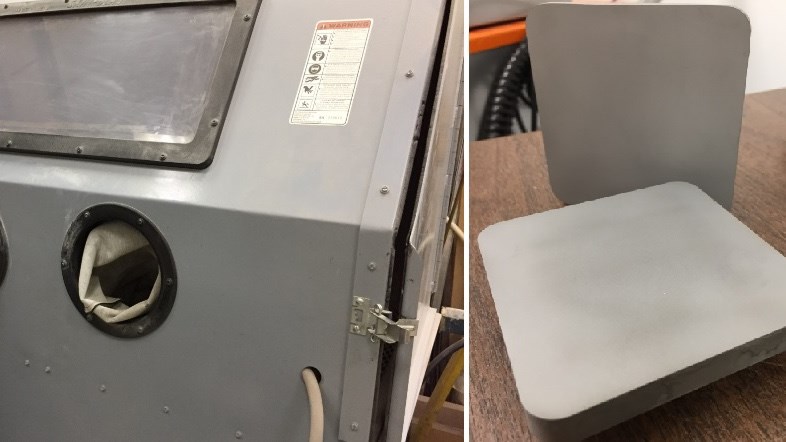
A combination of techniques can be used for surface finishing. At a minimum, you must have the ability to do glass bead blasting—both for the printed parts, but also for the build plate itself. A bead-blasted finish is recommended to improve the adhesion of the first layer of powder to the build plate. (See Figure 8, above the bead blaster and post-processed build plates (right), ready for use again).
6. Other Capabilities
The list above is what I would consider a minimum list of capabilities one needs to get started in metal 3D printing, but is not comprehensive and does not include facility, safety, environmental and housekeeping requirements, which I will cover in future posts. Additional CNC equipment for machining metal AM parts, heat treatment and HIP, and superior surface finishing and cleaning techniques are often called upon for metal additive manufacturing production, but these are highly dependent on the application and part design, which is why I have left them out of the above list.
In the next part of this series I will discuss the facilities requirements for metal 3D printing (electrical, inert gas, etc.).
About the Author
Dhruv Bhate
Dhruv Bhate is a senior technologist at Phoenix Analysis & Design Technologies (PADT) where he leads R&D efforts in additive manufacturing, with a focus on high-performance polymers and metals. Prior to joining PADT, Dhruv spent seven years at Intel developing several laser-based manufacturing processes, taking them from early-stage research to high-volume manufacturing. He also spent a year in the automotive industry, working for India’s largest car manufacturer, Tata Motors.
Dhruv has a Ph.D. in mechanical engineering from Purdue University where he developed constitutive and failure models for the prediction of fatigue fracture in ductile metal alloys. Prior to this, he obtained his M.S. from the University of Colorado at Boulder where he studied the phenomenon of adhesion in Micro-Electro-Mechanical Systems (MEMS) structures.
Dhruv’s passion lies in combining theory, experimental methods and simulation to solve challenging problems in new and effective ways. He has two patents, 16 peer-reviewed publications and more than 30 conference presentations to his name.
Related Content
Implicit Modeling for Additive Manufacturing
Some software tools now use this modeling strategy as opposed to explicit methods of representing geometry. Here’s how it works, and why it matters for additive manufacturing.
Read MoreThe New Misperceptions Of AM: AM Radio #35
Tim Simpson and Peter Zelinski discuss a way additive manufacturing has advanced: The misperceptions have shifted. Knowledge of AM among manufacturers is more sophisticated now. The concerns that inform the perceptions of newcomers have therefore changed.
Read MoreA Framework for Qualifying Additively Manufactured Parts
A framework developed by The Barnes Global Advisors illustrates considerations and steps for qualifying additively manufactured parts, using an example familiar to those in AM: the 3D printed bottle opener.
Read MoreNIOSH Publishes 3D Printing Safety Guide for Nonindustrial Settings
NIOSH has published a 3D printing safety guide for small businesses and other additive manufacturing users such as makerspace users, schools, libraries and small businesses.
Read MoreRead Next
Installing a Metal 3D Printer, Part 2: Facilities
What facility adaptations are necessary when installing a metal 3D printer? PADT documents the steps it took to support a Concept Laser Mlab Cusing R in this second post in a five-part series.
Read MoreProfilometry-Based Indentation Plastometry (PIP) as an Alternative to Standard Tensile Testing
UK-based Plastometrex offers a benchtop testing device utilizing PIP to quickly and easily analyze the yield strength, tensile strength and uniform elongation of samples and even printed parts. The solution is particularly useful for additive manufacturing.
Read MoreBike Manufacturer Uses Additive Manufacturing to Create Lighter, More Complex, Customized Parts
Titanium bike frame manufacturer Hanglun Technology mixes precision casting with 3D printing to create bikes that offer increased speed and reduced turbulence during long-distance rides, offering a smoother, faster and more efficient cycling experience.
Read More
