Inspecting Complex Geometries for 3D-Printed Parts
Sponsored ContentAs additive manufacturing moves into the production space, advanced inspection technology is becoming more critical to ensure part quality.
Share
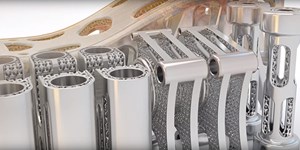
Manufacturing depends on reproducibility, and reproducibility depends on accurate measurements of parts. This has been true since the dawn of the first industrial revolution, and it holds true as additive manufacturing once again reinvents the manufacturing process.
Modern methods of measurement focus equally on speed and accuracy to maintain both quality and production-level cycle times. As this need grows, in-process metrology will become more important, providing responsive, flexible measurements while minimizing human intervention. However, different processes still necessitate different measuring techniques.
The Need for Accurate Metrology in Additive Manufacturing
In additive manufacturing (AM), the need for accurate measurement is even greater than in traditional manufacturing methods because AM involves manufacturing the material and product at the same time. Traditional manufacturers have the luxury of working with forged billets and blanks that have consistent, well-understood material properties, but AM technologies such as Directed Energy Deposition (DED) and Powder Bed Fusion (PBF) involve fundamentally changing the material properties as the machine manufactures the part. The heat that shapes the metal powder also changes the chemical properties of the metal, forming new alloys and complicating the validation process. An AM process simultaneously creates the geometry and the material,” according to Robert Bower, Consultant Engineer at Autodesk. “Because of this, additional inspection is required in order to identify whether there is residual stress, fatigue or any other physical defect in the properties of the AM component.” This can include stress-testing, chemical tests and CT scans. These tests can create a wealth of inspection data that quality control must consider, and it’s only one of the hurdles that AM faces.
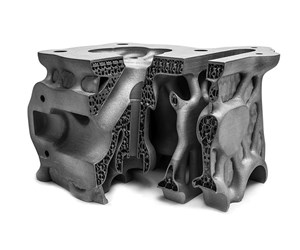
Hybrid manufacturing, which use both additive and subtractive methods to manufacture parts, provide a new set of challenges. To produce a part, hybrid approaches involve shaping the part with an additive machine, then cutting away excess material to achieve the desired tolerances. Autodesk’s Phil Hewitt says this creates a need for in-process inspection. According to Hewitt, when a machine switches between two wildly different processes such as 3D printing and milling, in-process metrology is necessary to verify that the part is reaching desired profiles and tolerances. Furthermore, because finishing processes for AM parts require machining excess material to achieve the desired tolerances, in-process validation is necessary for a hefty percentage of mechanical parts produced additively. In-process measurement, however, must contend with the complex part shapes common in AM.
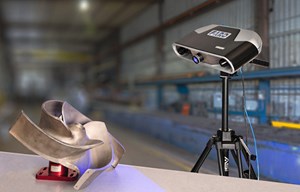
The major hurdle for scanning AM parts is the need to measure a variety of complex shapes, including near-net structures that provide inefficient geometries for touch probes. Near-net parts provide far too many points of contact for the probe to quickly and efficiently establish tolerance for each point. These complex shapes necessitate non-contact measurements, which can include both in-process and out-of-process solutions. Portable scanners, for example, can gather scan data from multiple angles. Despite relying on human operators, they provide accurate scans of complex parts in much less time than touch probes would take, making them efficient tools for quality assurance. In-process solutions, such as fixed scanner arrays, measure parts from multiple angles mid-process, combining multiple images in scanning software to create well-rounded models of a part. Both solutions provide scan data that is easily comparable to CAD information using tools like PowerInspect from Autodesk.
Read More on PowerInspect
- Smart Metrology for Additive Manufacturing
- The Future of Manufacturing and Metrology
- Best Practices for Smart Metrology
Measurement and Metrology Software Solutions
Measurement and metrology software like PowerInspect is vital to the inspection process, as it enables users to compare the scanned data to CAD models to verify the quality of the part, both to test prototypes and to ensure quality. It provides clear graphical displays that compare measurement data to designs, in addition to creating customizable reports. For industries with high standards such as medical, aerospace and automotive, part validation is key to ensure that printed parts live up to these high demands. Inspection must be incorporated into the standard practice of any manufacturer looking to incorporate additive processes into their production flow.
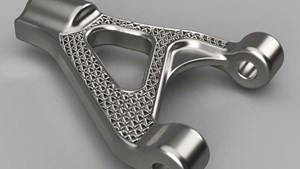
The ability to compare the scan of a part to its original CAD model is an important step in quality assurance, and it is especially important in AM. In AM, the part begins in the digital world as a mathematical model describing its dimensions and structural integrity. Because of this, and because of the complexity that additive parts can exhibit, the inspection process relies on comparing the part to the model to find aberrations and flaws in the geometry. Modeling the part makes certain structural predictions, and for a long time the only way to test these predictions on additive parts with complex geometries was through destructive testing. New inspection methods are moving toward nondestructive testing (NDT) with processes such as CT and X-ray scanning that can validate internal geometry without applying external force or pressure.
Standardization is still one of the most common challenges for ramping up additive production. To achieve targets for both quality consistency, manufacturers can rely on advanced inspection software to more effectively attain these goals. With inspection software, the ultimate goal is to generate data fast, touching every single point on not only the part exterior, but on the critical interior structural points that have been long inaccessible. New software makes this more feasible by increasing not only the efficiency of the entire validation process, but by providing an easier way to collect data points and compare them to original models, giving designers even more confidence in the final product.


